Why did the Entropy Resins epoxy go the Halloween party? Because it wanted to stick around for some boo-tiful bonding moments! 🎃👻
Forget store-bought decorations this year! These delightful, handcrafted Halloween Pumpkins will add a spellbinding touch of DIY magic to your Halloween décor. Get ready to awaken your artistic spirit—let’s get started!
PREPPING THE MATERIALS:
EPOXY:
- Clear Casting Epoxy Resin (CCR) with the accompanying fast hardener (CCF) or slow hardener (CCS), depending on the size of the mold you purchase.
- Typically, we recommend single pour depths of:
- No more than ½” deep with CCF
- No more than 1” deep with CCS
MOLDS:
Any silicone mold designed for use with epoxy will work for this project. It’s ideal to have a mold that has two separate halves, so you can pour your epoxy into both halves at once and avoid trying to color match from batch to batch. Just pay attention to the shape of the cavity openings, because the two halves will need to match up properly when you go to “glue” them together.
If you want your pumpkins to have a smooth surface, you’ll want to choose a mold that features a shiny surface on the inside of the mold cavity. A textured cavity surface will give your pumpkins a frosted look. Some of the bigger silicone molds get weighed down once filled with epoxy, so if you’re going for a pumpkin mold that’s bigger than the one we chose, just be aware that you may need to support the mold to help it maintain its shape.
THE RAZZLE-DAZZLE:
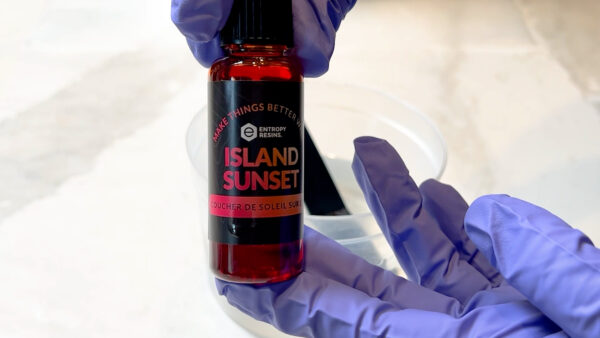
Colorants can be added to epoxy, and our Entropy Elemental Colors and Vivid Colors kits are perfect for customizing your pumpkin castings. From true opaques to mind-blowing transparency, experience a new level of creative freedom and expression. Create a seemingly endless number of different colors with our easy-to-follow color mixing guide.
Entropy Shimmering Metallics can be added to castings for a little more…razzle dazzle. Transform your project into a shimmering galaxy and bring the magic of the cosmos to your creations.
For some of our pumpkins, we opted for the cracked resin effect. To create the cracked resin effect, you can use decorative crushed glass within your castings.
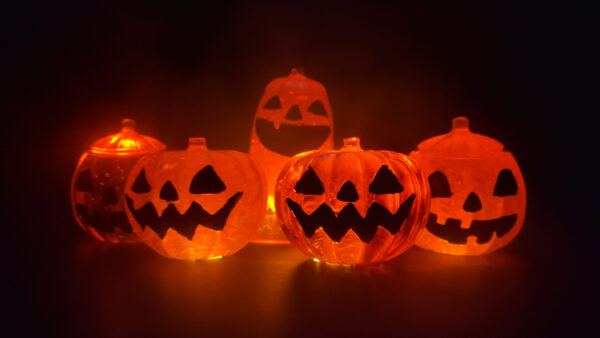
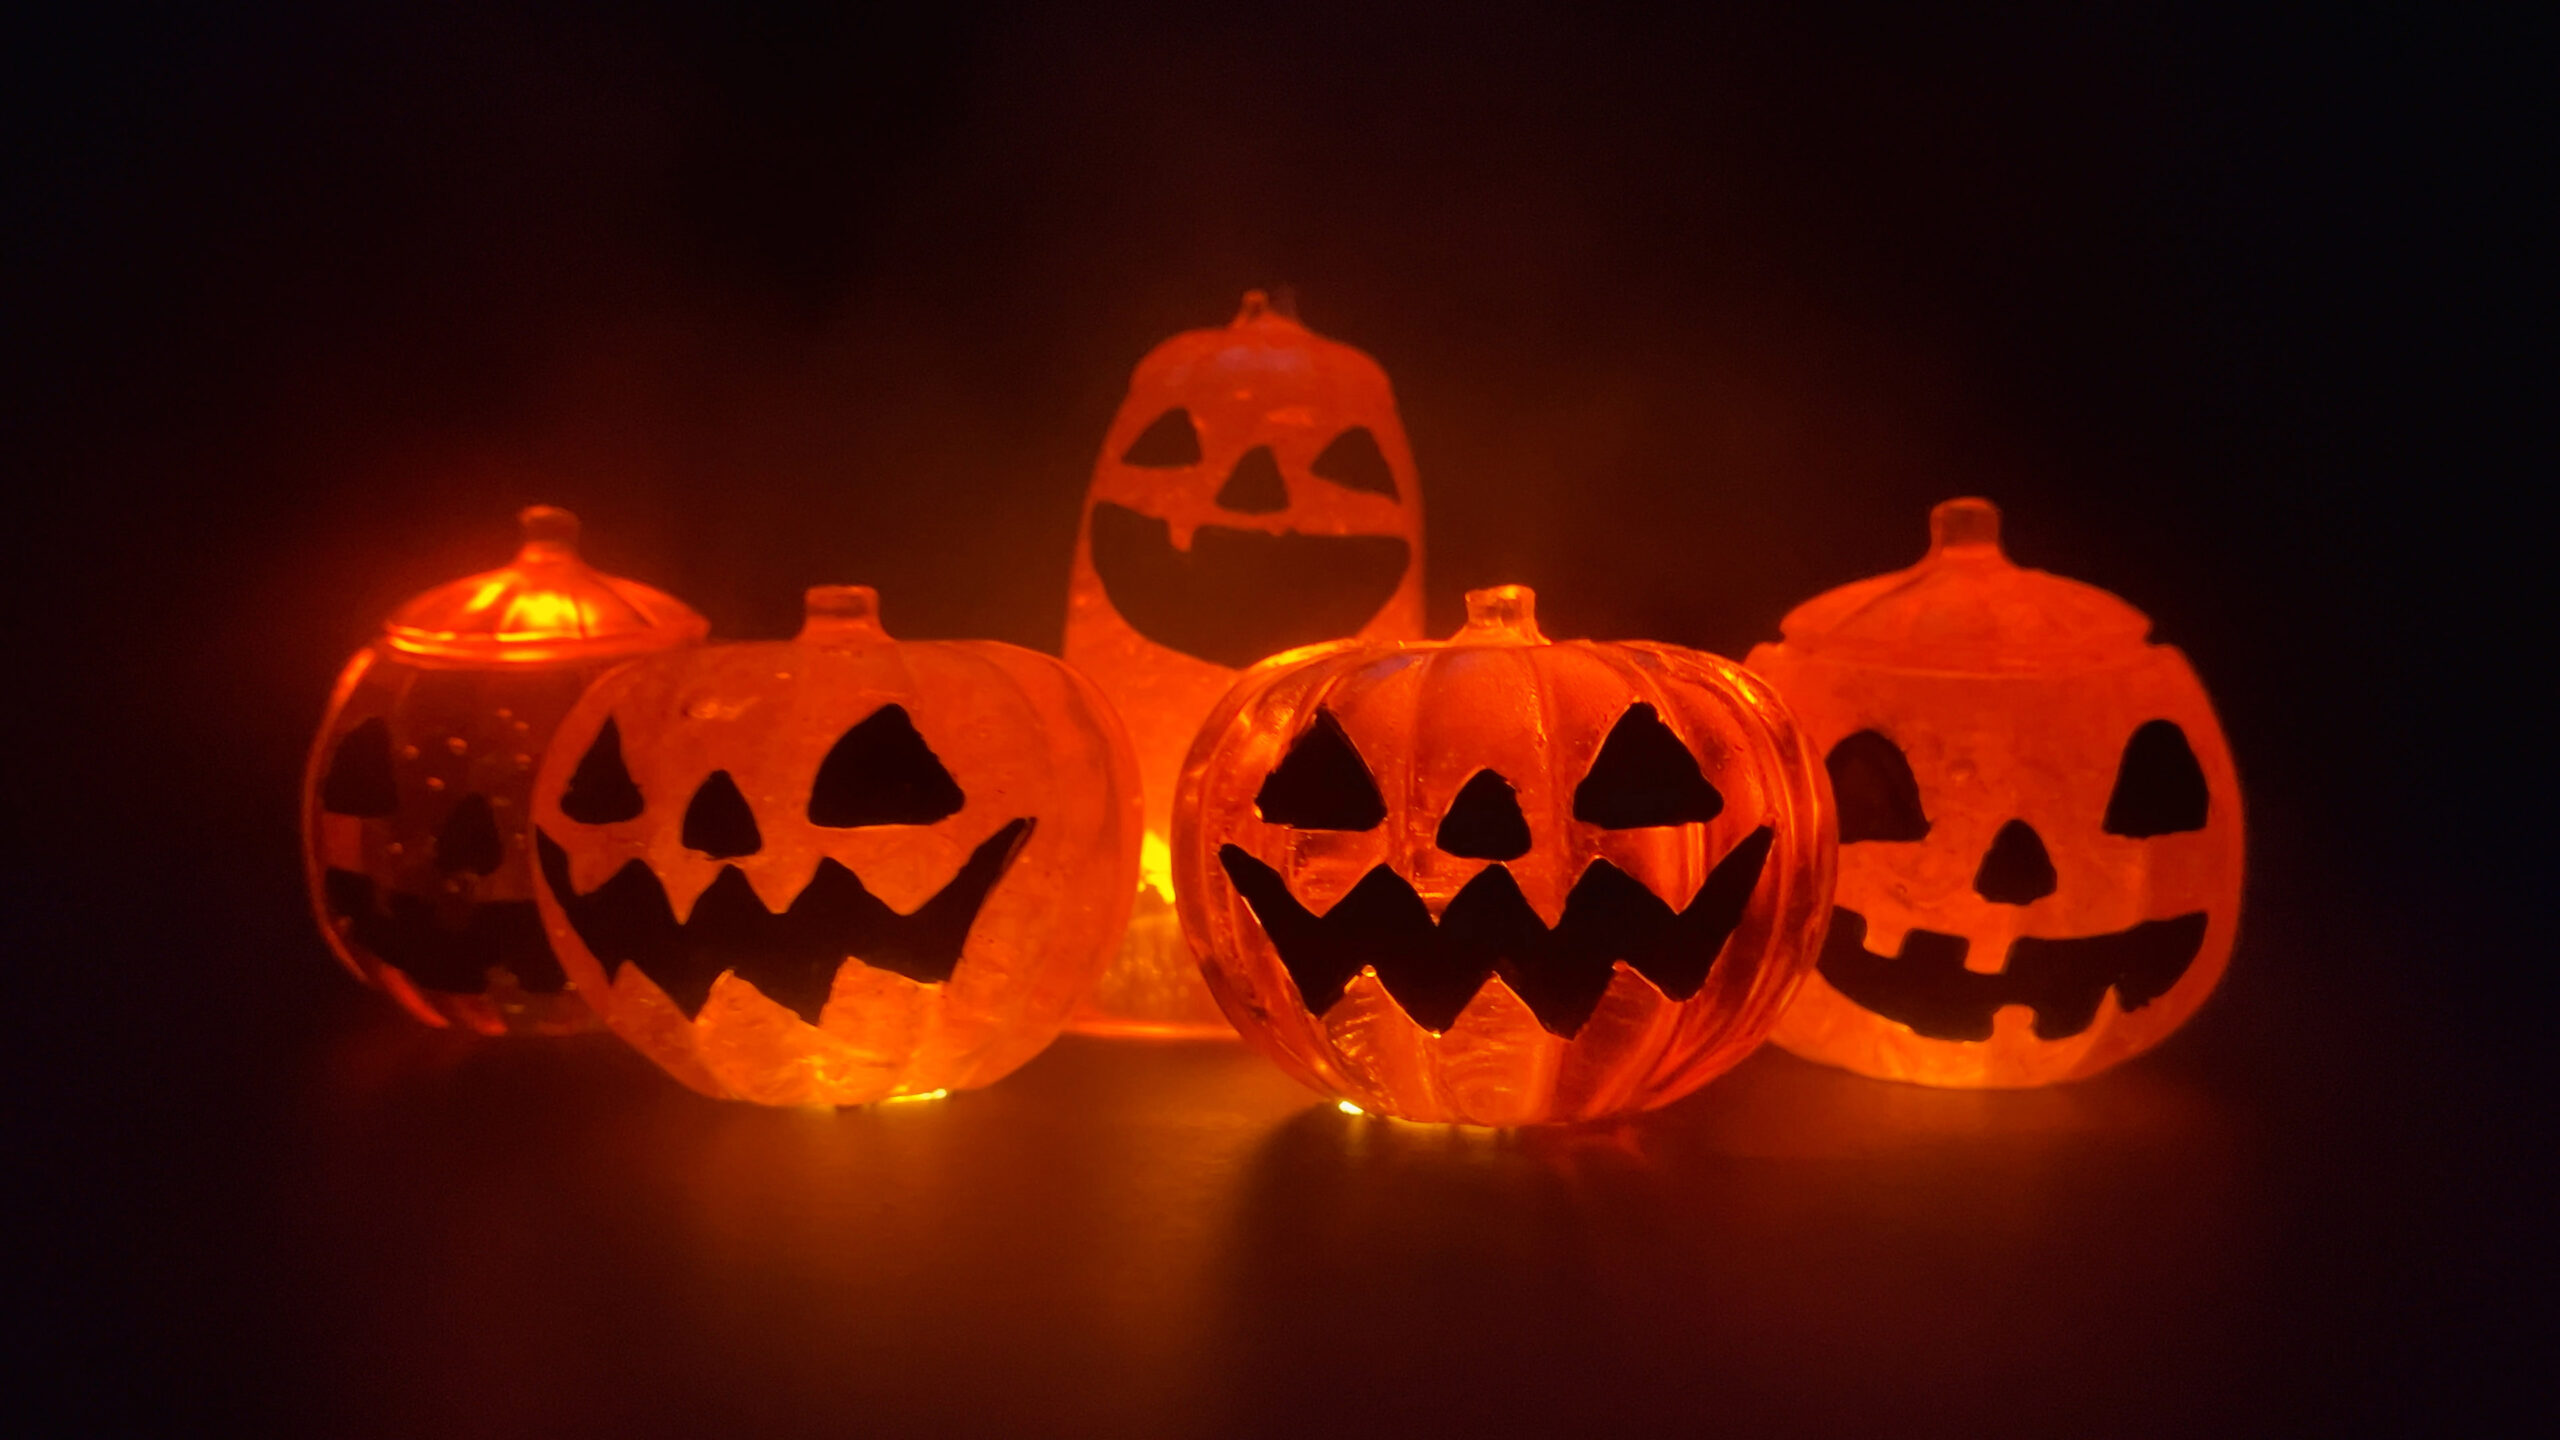
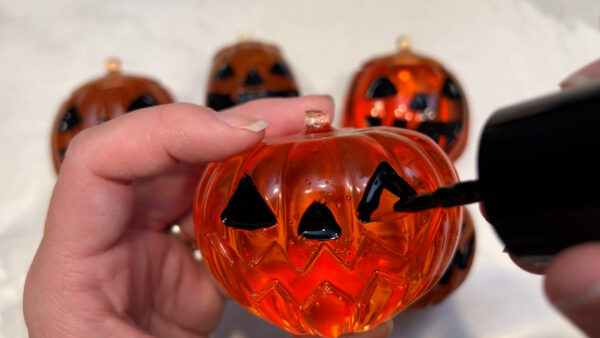
Because we wanted to accentuate the eyes and mouth of our mold to really let the Jack-O-Lantern features stand out, we used a solid opaque nail polish and brush. It flowed out nicely for a smooth finish, the overpaint scrapes off easily with a fingernail, and it was something we could easily get our hands on.
We love displaying our epoxy casting creations on little LED puck lights! If you want your pumpkins to really ‘POP’ when on display, you can pick these up at almost any craft store (or on Amazon). They’re inexpensive and very cool.
SAFETY MATERIALS:
Before starting on the project, it’s always a great idea to protect your workstation with some sort of plastic sheet that the epoxy won’t soak through. When working with epoxy, always be sure to wear gloves and safety glasses. Our biobased epoxies may be made from renewable resources, but remember—a lot of renewable resources found in nature are still toxic to humans.
You’ll also need epoxy mixing cups and mixing sticks, paper towels, and solvents at the ready in case of any accidental spills. Check our Creator’s Kit which includes the safety and project tools you’ll need for several projects.
THE PROCESS:
1. COLLECT MATERIALS
Get all of your materials together before you start. Having everything you need within arm’s reach makes things go much smoother and allows you to work more cleanly.
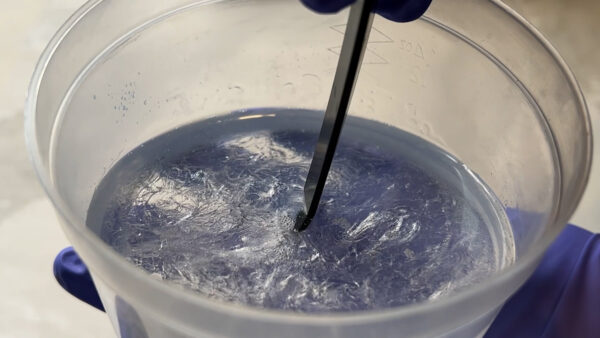
2. MIX YOUR EPOXY
Dispense the proper 2:1 ratio of Clear Casting Epoxy Resin and your chosen hardener (CCF Fast Hardener or CCS Slow Hardener) into your mixing cup. Mix the epoxy using a mixing stick thoroughly, until it is no longer cloudy and there are no visible streaks.
3. ADD YOUR COLORANTS
All colorants (liquids and metallics) can be added at the same time. It may be best to add a small amount of colorant at a time to get your desired intensity level. A little goes a long way! It’s much easier to add more color later, vs. trying to dilute it down and potentially using more epoxy than you had planned.
4. ADD YOUR EXTRAS
If adding objects into your mold, like cracked glass, place the objects in the mold. Make sure that your objects are below the top lip of the mold. This will become important later when assembling the two halves.
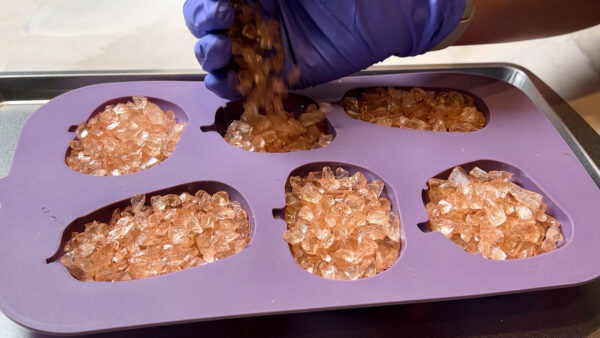
5. POUR YOUR EPOXY
Pour the epoxy into your mold halves until they are full. Allow to cure. Cure times depend on the room temperature, the volume of your epoxy mold, and the hardener speed you selected.

6. POP THEM OUT
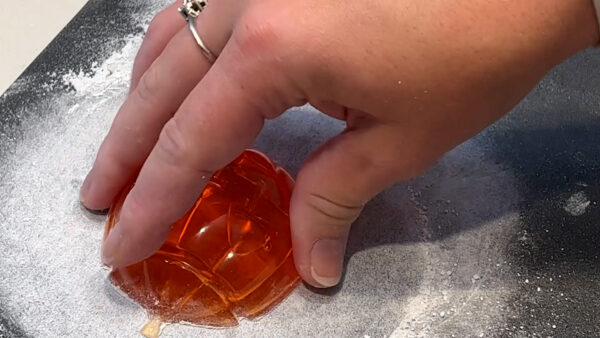
Pop the fully cured product out of the mold. The epoxy casting will have a lip where the meniscus of the epoxy met the wall of the mold (you’ll see what we mean). This lip will need to be sanded down before you can bond the two halves together and not have a noticeable seam. If you added objects like crushed glass into your project, and they didn’t stay below the surface of the epoxy mold when curing, any bumps will also need to be removed/sanded down.

7. TIME TO SAND
Place a piece of 80-grit sandpaper on a flat work surface. Rub the bonding surface of your 2 halves on the sandpaper until the bonding surface is 100% covered in scratches. These scratches will act as grooves that will fill with your glue of choice and give a strong bond when you bond the halves together. It’s important to keep the halves completely flat when sanding, so they will fit together with minimal gapping.
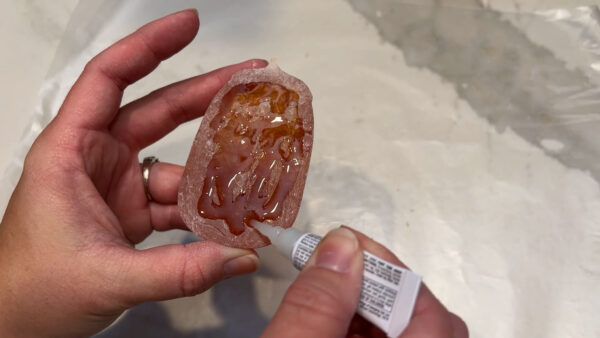
8. BONDING THE TWO HALVES
Now that the bonding surface is dull and flat on both halves, it’s time to bond them together. For this step, there are two options:
-
- Epoxy bond – You could use one of our quicker curing CLR/CLF for the strongest bond. This also has a little bit of thickness to it to hide any gaps in case your halves didn’t turn out perfectly.
- Cyanoacrylate bond – An alternative method, that may be more readily available, is using a cyanoacrylate. The bond won’t be as strong and won’t have any gap-filling properties, but it will cure quickly.
Whichever method is used, you want to be sure to use enough product to coat the dulled surfaces, but not so much that you get squeeze-out. The extra product that may squeeze out of the bond line needs to be cleaned up before it cures so it doesn’t wreck your smooth surface.
9. DECORATE!
Once you’re sure the bond has cured, you can accentuate the features of the mold with decoration. For this mold, I used black nail polish. It gave me a solid opaque color, flowed out nicely for a smooth finish, I could scrape off any overpaint with my fingernail, and it was something I already had on hand.
10. ENJOY!
Display and enjoy. I love lighting these little decorations to really make them pop.