How To Make a Silicone Mold
Basics First
Below you will find our simplified take on silicone mold making. The idea is to keep things simple, use household items when possible and enjoy the mess along the way. Let’s jump in.
Materials
You will need the following:
- A small item to cast- make sure it’s clean
- Silicone- preferably tin cure
- Mixing Cups- 2 party-style drinking cups
- Stir Sticks- popsicle type will do
- Safety Equipment (gloves and mask)
- Cardboard
- Parchment Paper
- Glue Gun- preferably a dual temp
- Patience- Critical
Let’s GO!
1. The Item
Choose an object that you want to replicate. Something small, basic, and simple. This exercise is just a self-test before we get into the advanced mold-making projects. It could be a seashell, a figurine, Lego, or even a rock from outside. Make sure that the object is clean and dry before starting the process. Wash it with a dish-type soap, then dry. Oh, plug in the glue gun and warm it up.
2. Prepare the Mold Box
This is the housing of your mold. Usually, a basic square or circle will contain the silicone as it is poured over your object. Hopefully, your object is small, like playing dice or something of that nature. Cut the cardboard into strips. Go with 1″ longer and 1/2″ taller than your object. Set your parchment paper down and glue the item down so it stands firm on the paper. Next, use the strips of cardboard to form a box around the object. Glue up all edges of the cardboard strips to ensure the silicone does not leak out.
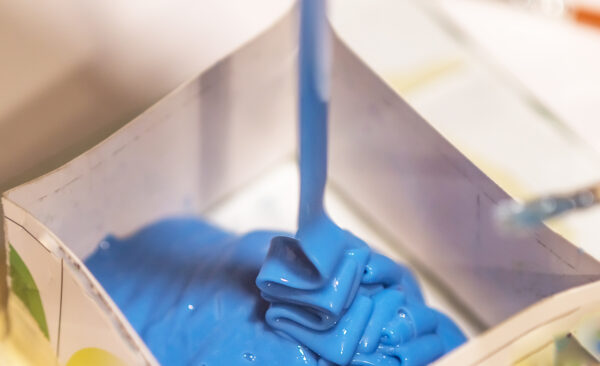
3. Mix your Silicone
Next, prepare the silicone according to the instructions on the package. We suggest a mix that is 1 to 1, meaning equal part A side to B side. Mix the material in the party cup until the silicone color is 100% UNIFORM. That means no swirls of darker colors floating around in your cup.
Apply a release agent to the object and the container to prevent the mold material from sticking. Pour the mold-making material over the object, ensuring it covers the entire surface evenly. Tap the container gently to remove any air bubbles.
4. Pour and Walk Away…Don’t Touch It!
I will preface this early on before you pour. Usually, this is where we would de-gas or remove the air bubbles from the silicone using a vacuum chamber, but we will go to this old school. Pick a corner of the newly formed mold box, get that cup of silicone about 18″ above the spot where you will pour, and let it flow at the thickness of a guitar string. This will naturally release air bubbles from the material. KEEP THE POUR IN ONE PLACE. I know it is tempting to go ham and spread the material, but it will flow over your object perfectly. Trust!
The mold-making material will take some time to set, usually 18-24 hours before removal. Follow the recommended time on the package and wait patiently for the mold to harden.
5. Remove the Object from the Mold
Once the silicone has been set, carefully remove the cardboard walls and peel the mold from the parchment paper. Ultimately, you will have a cube of silicone with the bottom of your object left visible. Flex it out, or you can cut the mold halfway open and remove the object with a knife or scissors.
Look at what you have done…a MOLD!! This process is done by Pacific Mold Design on a daily basis. To this day, nothing is more rewarding than a successful birth of a mold. You can do it because we started in this way too.
Now, go cast a few duplicates of your thingamajig!
- Check out our How-To’s for more info on Bubble Free Casting in your next project.
- Shop Clear Casting Resin for your next pour.

A special thank you to our guest blogger and Better Makers Affiliate, Blake Warner, for collaborating with us on this in-depth guide on how to make your own silicone molds. Whether you’re a passionate crafter, a DIY enthusiast, or a professional artist, learning this versatile skill opens up a world of endless creative possibilities. We hope you enjoyed this step-by-step process of creating high-quality silicone molds right in the comfort of your own home. From selecting the right materials to mastering essential techniques, we’ve got you covered. Have fun crafting custom silicone molds that will bring your artistic visions to life and don’t forget to check out https://pacificmolds.com/ for more information on pre-made silicone molds, or if you just aren’t the DIY mold type.